Mount Remus
“I pulled out my knife and began carving away at the ice.”
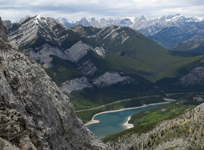
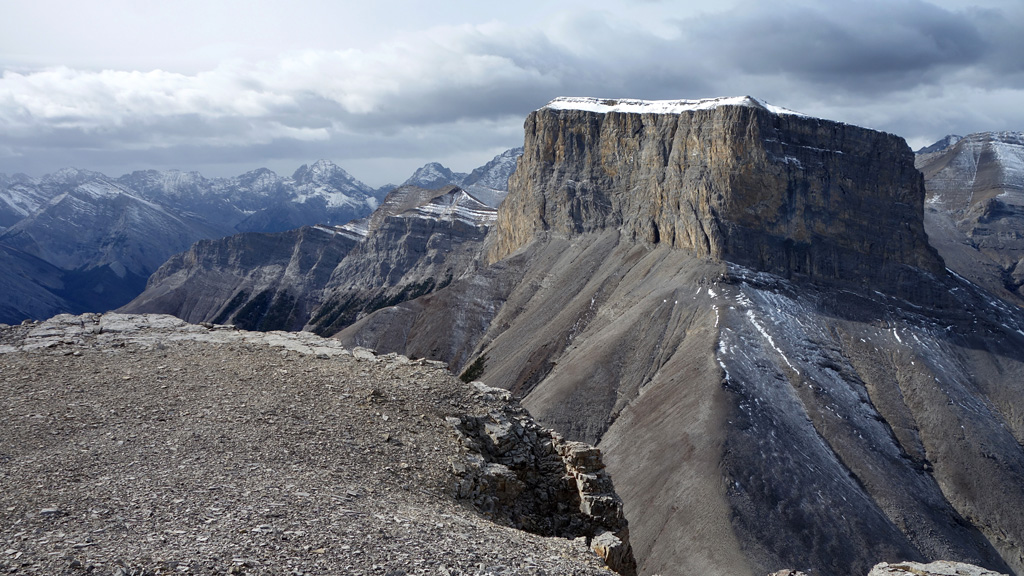
Above: The summit of Mt. Remus, Banded Peak and Mt. Cornwall from the northwest ridge of Mt. Remus
October 12, 2015 / minute read( words)
Following ascents of Mt. Romulus and Prairie Mountain under challenging weather conditions, Aga and I decided that Mt. Remus would serve as an exciting conclusion to our Thanksgiving weekend festivities in the Elbow River area of Kananaskis. We had a great look at the route from our Romulus outing, had our river-crossing technique down to a fine art, I was feeling slightly less ill, and it was a beautiful day. What could possibly go wrong?
Although Mt. Remus is categorized as a moderate scramble in Alan Kane's book (Scrambles in the Canadian Rockies), this is only the case mid-summer when the mountain's completely dry. Both the chimney and northern ledges routes to the summit are completely sheltered from the sun, and ice over quickly during shoulder season. When contemplating an early or late season ascent, be sure to bring your mountaineering gear (ice axe, crampons) to avoid disappointment or a harrowing experience like the one Aga and I had.
Routefinding
The Approach
An ascent of Mt. Remus begins near the Little Elbow Campground in Kananaskis which, in turn, can be found at the end of Highway 66 when heading west from Bragg Creek. While many maps show a highway (the Powderface Trail) coming from Highway #40 to the north, the catastrophic flooding of 2013 took out some bridges, and that road's been closed ever since. Depending on the timing of your outing you could have the choice of starting from two parking areas; one at the very back of the camping area (when it's open), and another just to the left (south) of the campground gates which is open any time Highway 66 is (June through November). Parking at the back of the campground can trim 3km from the overall trip length, but that wasn't an option for us in October.
As the trip begins and ends with 8km of decommissioned road travel, bringing a bike is highly recommended.
Maps without an available GPX file were drawn from memory, and should only be used as a REFERENCE.
From the normal parking area head west from near the washrooms (taking advantage of a few footpaths) back to the road, ride past the gates, and through the campground to the official trailhead. The routefinding doesn't become any more complicated once you're on the trail (road), with only a single fork in the trail occurring a kilometre later where both options (one across a “beach” area, the other through the woods) will lead you back to the same trail. Just continue along the mellow road until you reach the day's first crossing of the Elbow River at the base of some cliffs.
As you can imagine, the Elbow River in October is a rather chilly body of water. After switching from our mountaineering boots to sandals, and rolling up our pant legs, Aga and I carefully waded across while carrying our bikes (don't push your bike as the current gets stronger midway across and you'll have difficulties). I found that my legs and feet went numb pretty quickly (the water's about knee deep), which allowed me to focus on my footing until I was safely across. A towel came in very handy at this point, ensuring our feet were dry and that our boots and socks would remain so moving forward.
Continuing along the road, you'll know that you're beginning to near the end of the bike section once the trail reaches the river bank and you begin seeing views like those in photos #3 and #4. Not far along this section, you should see a trail heading into the trees on your right with a small cairn. Before you reach the rocky riverbed on this trail, you should find another one heading to your left which provides some good places to stash your bike (a lock's not a necessity, but wouldn't be a bad idea). With your bike stashed, backtrack to the first trail and drop into the riverbed.
The objective here is to find the easiest way across the river. Aga and I poked around a bit with the hopes of finding a quick rock-hopping spot where we could keep our boots on but had to settle for a shallow traverse in our sandals.
Ascending Mt. Remus
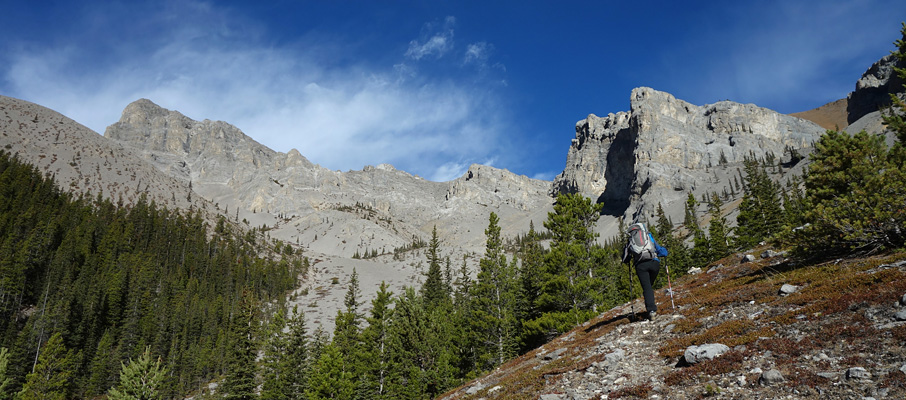
Once you've dried off, you'll want to make your way towards a solid trail that follows the right shoulder of a major drainage descending to the river from Mt. Remus. Relative to the viewpoint in photo #4, you'll find the drainage 100-200 metres to the left (west) or, if you prefer, you can ascend the hill directly ahead and then drift left until you encounter the trail. Either way, follow the trail upwards into one of the nicer mid-mountain areas I've encountered in the Rockies.
Full of interesting formations, towers, imposing cliffs, and strategically placed trees, the southern bowl area of Mt. Remus, its approach, and its overlooking ridge provide all kinds of impressive features and vantage points. This constant visual distraction offers a welcome respite from what's happening underfoot as the solid trail of the approach soon gives way to the very loose scree of the bowl.
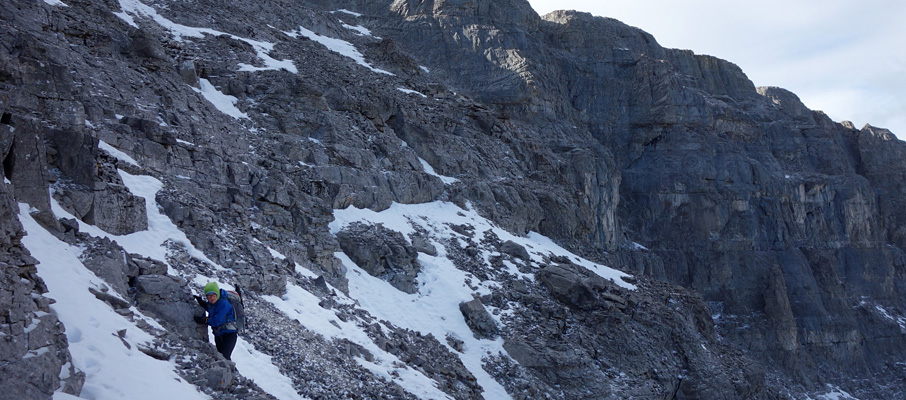
The end of the trail will bring you to the end of the “brown scree road” which, as seen in image #6, is a Wizard of Oz-like trail that blazes down the descent route. While some people opt to ascend this way, I wouldn't recommend it, as you'll enjoy treadmill scree almost the entire way to the ridge top (which is well out of view at this stage). Instead of that, Aga and I continued along the right bank of the main drainage and then crossed the open bowl towards a rocky drainage (see photos #9-12) which provided solid steps to the base of the ridge's high point. Here we found a bypassing trail that soon led us to an open plateau between the ridge and Remus's gigantic summit block.

It was at this point that we made a substantial strategic mistake. Looking up the approach to the chimney route, we could see only a few small snow patches, no visible snow around the chimney itself, and no cornicing above. It looked like a ‘go’ from my point of view, and so much faster (which it is), but Aga felt less optimistic. After a brief discussion, I handed Aga my GPS unit (loaded with Bob Spirko's route for the northern ledges), and we set off in different directions with the intent of meeting at the summit.
Alone now, I made my way up the slope on a solid scree trail without difficulty and soon reached a sheltered alcove at the base of the chimney. To my surprise, there were three possible chimneys, and the one I had been gauging on the approach (the middle of the three) wasn't the one you're supposed to climb. I could see a pair of cairns on the left-most chimney and, even though there were a few tufts of snow here and there, it looked pretty dry. What I didn't know at this moment, but would soon discover, was that every sky-facing surface above me was covered in ice. Seeing as my ice axe and crampons were safely back at our camp, this was a significant problem. [We had encountered no snow at all on our ascent of Romulus, and could see no reason to think Remus would be any different from either Prairie Mountain or our local camping spot.]
The first section of the chimney was pretty open with a series easy of rock steps leading a small cliff band. Encountering ice from the very first ledge, I cautiously made my way up to the cliff band where the crux step awaited in a squared-off corner on the climber's left. The challenge with the crux step is that there are no good handholds available. What you need to do is use a small foothold on the left wall to boost yourself up a solid 2 feet to reach usable handholds above. In dry conditions, this probably isn't a big deal for anyone with reach, as the solid ledge at its base provides the necessary platform from which to launch. However, on this day both the step and ledge were covered in ice, like everything else. Any attempt would be committing, with failure resulting in a swift ride back to the base of the alcove.
A sane person in this situation would retreat, but since Aga and I had separated, we had created a situation where we both felt pressure to summit quickly in spite of the conditions. I was losing a fair amount of time in this chimney but felt I'd be way behind Aga if I backtracked and headed for the northern ledges, and she might worry upon finding no one at the summit. What I didn't know was that the northern ledges were also an icy mess and that she was struggling her way up with similar worries about me. Had we stuck together on either route we almost certainly would have turned back. It would be a lesson learned the hard way.
Anyway, back at the crux, I had a flashback to an icy chimney I had negotiated on the third major cliff band on Mt. Chephren where I used my ice axe to ‘clean up’ successive steps until I was through. With no axe at my disposal, I turned to my next best option, pulling out my utility knife and began carving away at the ice. The thin blade wasn't super effective against the hard ice, but after a few minutes work, I was ready to give it a shot... and was very relieved to pull myself onto a small perch above the crux next to a cairn. After taking a moment or two to relax and re-focus, I committed to the upper half of the chimney which, despite its increased exposure, provided a reliable sequence of holds to use.
Soon I found myself on the broad summit plateau of Mt. Remus, where a quick power walk against a fierce westerly wind brought me to the true summit. Despite my difficulties and delays, Aga was nowhere to be seen.
The Descent
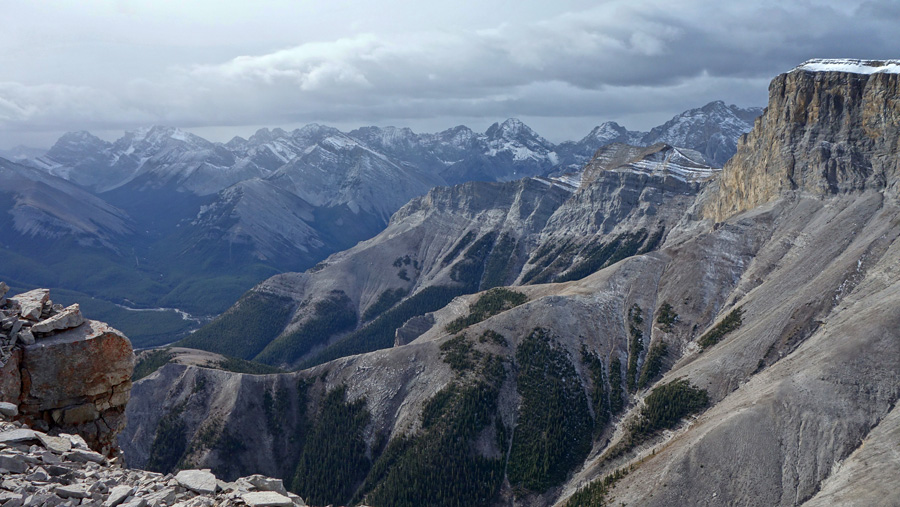
I paced around the summit taking photos and then began searching over the northern edge of the summit plateau as the minutes past without Aga's arrival. I began to become concerned as I didn't know the route down the northern side and it seemed increasingly possible that she had turned back. Every gully I gazed down towards the western end of the north face looked steep and seriously exposed. I expanded my search towards the eastern end and was relieved to not only find the descent chimney, but also confirm it by seeing Aga's face gazing back at mine from below.
While much shorter than the main crux chimney on the east face (about 3-4m vs 8-10m), this exit from the northern ledges was also awkward to negotiate and icy. The first few steps have good holds, but good handholds evaporate midway, and then you need to use your legs to boost and then beach yourself onto a flat ledge before the last few steps bring you onto the summit plateau. After helping her through we made a quick visit to the summit, where the winds continued to howl, and then retraced our steps to the descent chimney and downclimbed our way to the top of the northern ledges.
Now there are two kinds of people In the Rockies: those who will do anything possible to avoid snow, and those who gravitate towards it. Most of the time I fall in the former group, and it seems Aga shares this trait. That Aga couldn't quite remember the route that had brought her up the northern ledges wasn't a big deal — we were both rushing while dealing with the challenging conditions — but that she had managed to ascend a slope littered with snow patches without leaving a single visible footprint of where she'd been was an impressive feat. Even the GPS track was of no use here; the northern ledges are completely sheltered from the sun and much of the southern sky, producing an impossible sequence of zig-zags that leapt about the mountain. We'd have to improvise our descent route through a maze of iced-up gullies and steep ledges.
In dry conditions, one could probably make their way down these scree-filled gullies with reasonable ease before traversing back to the mountain's mid-level plateau, but the mix of frozen scree and ice meant our best bet was to carefully weave our way down rocky ribs and traverse exposed ledges. We started out by taking a relatively dry line to the skier's left, and once we were about a third of the way down the route, we transitioned to a huge traverse to the skier's right towards what appeared to be a large cairn but was actually a natural rock feature. Neither section was without potential peril, as I only had my poles and she had poles with microspikes, so we tread carefully and slowly. Upon reaching the cairn-like rock feature, we took advantage of a snow-filled, protected gully to descend further and continued zig-zagging as safely as we could down the mountain.
After negotiating the last section, a small frozen waterfall that thankfully had a few moderate steps to one side and a rock wall to hold on to, we finally reached the mid-mountain plateau. The sense of relief was great, and there may have been hugging. Back on dry rock and in the sunshine, we were able to relax and enjoy the long, easy traverse across the plateau and its connecting ridge, before blazing down the ‘brown scree road’, across the river, and eventually on to a much-deserved victory meal in Bragg Creek.


 from the alcove")


")