
Mount Edith Cavell
“Awesome rock, constant exposure, and a never-ending climb...”
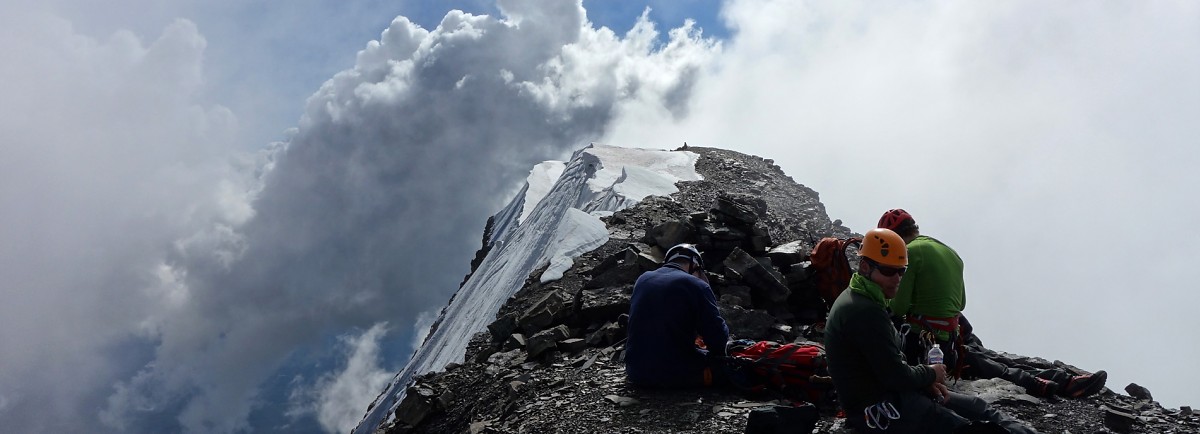
Above: Taking a much deserved break at the third (lowest) summit of Mt. Edith Cavell
August 05, 2013 / minute read( words)
Following Mt. Athabasca, Mt. Edith Cavell is easily the second most iconic mountain in all of Jasper National Park. Whether to photograph the giant from the turquoise waters of Cavell Lake, to ignorantly tempt fate while gallivanting around the base of the impressive Angel Glacier, or to hope for a glimpse of a caribou heard from the Cavell Meadows, tourists from all over the world flock to the base of this scenic mountain.
My plans for ascending Edith Cavell in the summer of 2012 were dashed when the Ghost Glacier, a huge serac hanging precariously from the mountain’s north face, succumbed to the forces of gravity and unleashed a cascade of water and ice which destroyed trails, the nearby parking area, and a large section of the Edith Cavell road. Had this not happened in the dark of the night, dozens could have been killed. The whole area was closed off to the public until this spring as Parks Canada worked diligently to repair the damage.
Denied the opportunity in 2012, this mountain was near the top of my list for this year and I jumped at the opportunity to climb it when the invite came to join Grant and Steven. Considered a classic mountaineering route, our ascent of the intimidating east ridge lived up to everything I had read and we completed the full traverse of the mountain with a return via Verdant Pass during a beautiful August day.
Routefinding
There are two standard routes for ascending Mt. Edith Cavell, both of which are touched upon in this report. The first is the alpine climbing/free-soloing route up the east ridge (rated 5.3), and the second is a moderately difficult scrambling route up the west ridge. A typical traverse of the mountain involves ascending the east ridge and descending the west.
Our desire to free climb the east ridge would be compromised by any new snow or rain on the mountain, so we let the weather decide our path. It would be the east ridge if we woke to clear skies or it would be the west ridge if the weather looked questionable in any way. We woke to a beautiful field of stars at 3:00 am and, after gearing up and eating a quick breakfast, we were off hiking along the Cavell Meadows trail towards the eastern col and the challenges beyond.
Although the route was recorded with a GPS unit, this data should only be used as a SECONDARY navigation tool.
The Approach
The first section is an easy hike along a paved path as you follow the Cavell Meadows trail through its first pair of switchbacks and then along a moraine. When the main trail turns to the left, (east) into the trees, follow a less-used trail continuing along the moraine. This easy to follow trail will lead you to the final snow slopes that you'll need to climb to reach the col. Note that this trail sticks mostly to the lowest areas of this "U"-shaped moraine; so if you lose the path momentarily while climbing by headlamp, resist the temptation to begin climbing up the slopes to your left.
It took us roughly 1:15 to reach the col from the parking lot, having already gained 563m (1,847 ft.) of elevation. We enjoyed a quick break, discussed the ascent route up the first ridge, and then began the scramble upwards to the right of an obvious drainage.
Soon thereafter dawn broke and we were delighted to see an inversion blanketing the entire Icefields Parkway valley in cloud. This was yet another aspect adding to an overall special day.

I really enjoyed scrambling this first ridge. It starts out with a lot of easy hands-on climbing and then throws in short challenging sections here and there as you get higher. It gives you a great opportunity to get a feel for the rock, get into a nice climbing rhythm, and build up your confidence; the latter of which will really come in handy once you get a close look at the intimidating east ridge of the mountain.
A couple of route-finding details to note about the first ridge are: 1) do not cross or ascend the drainage. At one part it seemed like the natural route was to cross the drainage, but then we found a chimney just to the climber's right which allowed us to continue (see image #2). 2) Once you reach a bit of a plateau midway up this ridge, aim for the middle rib with lighter coloured rock to continue your ascent (see image #5). Aside from a quick snow crossing and a few slippery black rocks we encountered no real difficulties traversing from the top of the first eastern ridge to the base of the main eastern ridge.
The East Ridge
Edith Cavell's famed east ridge is impressive to behold, let alone climb. A razor sharp corner on a perilously tall pyramid, the whole mountain falls away to the periphery leaving only you, the rock immediately ahead and behind, and open air. It's simply a stairway in the sky; one that rewards boldness and skill, and one that will severely punish a mistake. Standing at the base of this ridge, still 441m (1,447 ft.) below the cloud-hidden summit, one has to take a deep breath and say to themselves, “Yeah, I'm about to do this”.

Unfortunately, I need to write the remainder of this report at a much later date, but the photos do tell much of the story of ascending the east ridge.
As I alluded to earlier, we chose to free climb this section but were carrying all of the necessary equipment to perform a more traditional climb, were wearing our harnesses so that a rope could be lowered to a person should they become stuck, and were capable of setting up rappels should we need to retreat from the mountain. Of course, that would do absolutely nothing in the case of a fall, the consequences for which would be severe for all but a few brief sections, but that was the choice we made.
Three things I remember vividly about the east ridge is how awesome the rock was, the exposure, and its never-ending nature. The rock’s solid and there are excellent holds everywhere. There were sections where I could just blindly reach above and immediately come up with a great hold. Of course, I checked before committing, but there was rarely a need to find another hold. The last few pitches of the mountain were a bit looser, but they were also technically easier to ascend.
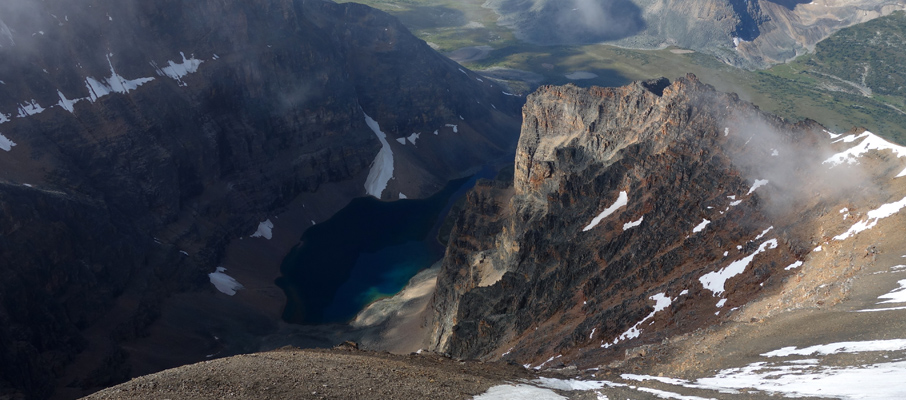
While the ridge looks intimidating on the approach, the downward views from it are something else altogether. At one point on the main crux pitch we swung out briefly to a ledge on the south face of the mountain and, when it was my turn, I looked down to see only open air and clouds.
Knowing that you couldn’t make a mistake made for (at times) some pretty tense climbing. Thankfully the ridge has ledges at regular intervals where I could take a break, shoot a bunch of photos, and reset myself in preparation for the next section. And there was always a next section.
One thing to be mindful of with the east ridge is how long it can take to ascend. It took our group 3:40 to ascend the 1,220m to the base of the ridge, and another 3 hours to reach the first summit 450m above that point, and that was while moving at a good pace and placing no protection. Make sure you allow yourself a solid window for the climb, as parties do run out of time here and sometimes require rescuing as a result.
Reaching sight of the first summit was a major relief, even though we immediately needed to equip our crampons for short ice traverse over a section that runs out over the airy south face of the mountain. From there it was an easy hike to the second (and true) summit of Mt. Edith Cavell. Despite some cloud, the views in all directions were fantastic. After a brief time there we ventured to the third summit where we relaxed for a long time and had lunch.
The Descent (Scrambling Route)
The descent from the third summit to Verdant Pass took us along the alternative scrambling route for the mountain and it was almost entirely a hands-free scree affair. We essentially hiked from the third summit to the Edith Cavell/Sorrow col before taking a line down the bowl there. Make sure that you do go all the way to the col because you will get cliffed-out if you decide to head down at an earlier point.
The descent here is on very loose scree and we had to allow a pair of climbers ahead of us to gain a huge lead to avoid showering them with debris; and even then, we often had to completely stop or shout a warning down the slope. There were a number of large rock steps towards the bottom of the slope which included pretty much the only hands-on climbing for that route (moderate difficulty). Soon we were on the grassy plains of the beautiful Verdant Pass.
Share this report on:
After barely two hours of sleep the night before and a huge climb, Steven and I were completely bagged at this point of the journey. Thankfully we only had an 11km, 3-hour hike back to the car to contend with! (Grant was somehow able to jog the last trail section of that return, which is gross and somehow cosmically unfair). While that death march wasn't the most stylish way to end the day, the overall experience was one of my most memorable to date.
Steven, Grant and I made use of Dow Williams helpful notes published on SummitPost when planning our route for the day.


")


")


")


")
")


")


 Summit")


")


